step 1
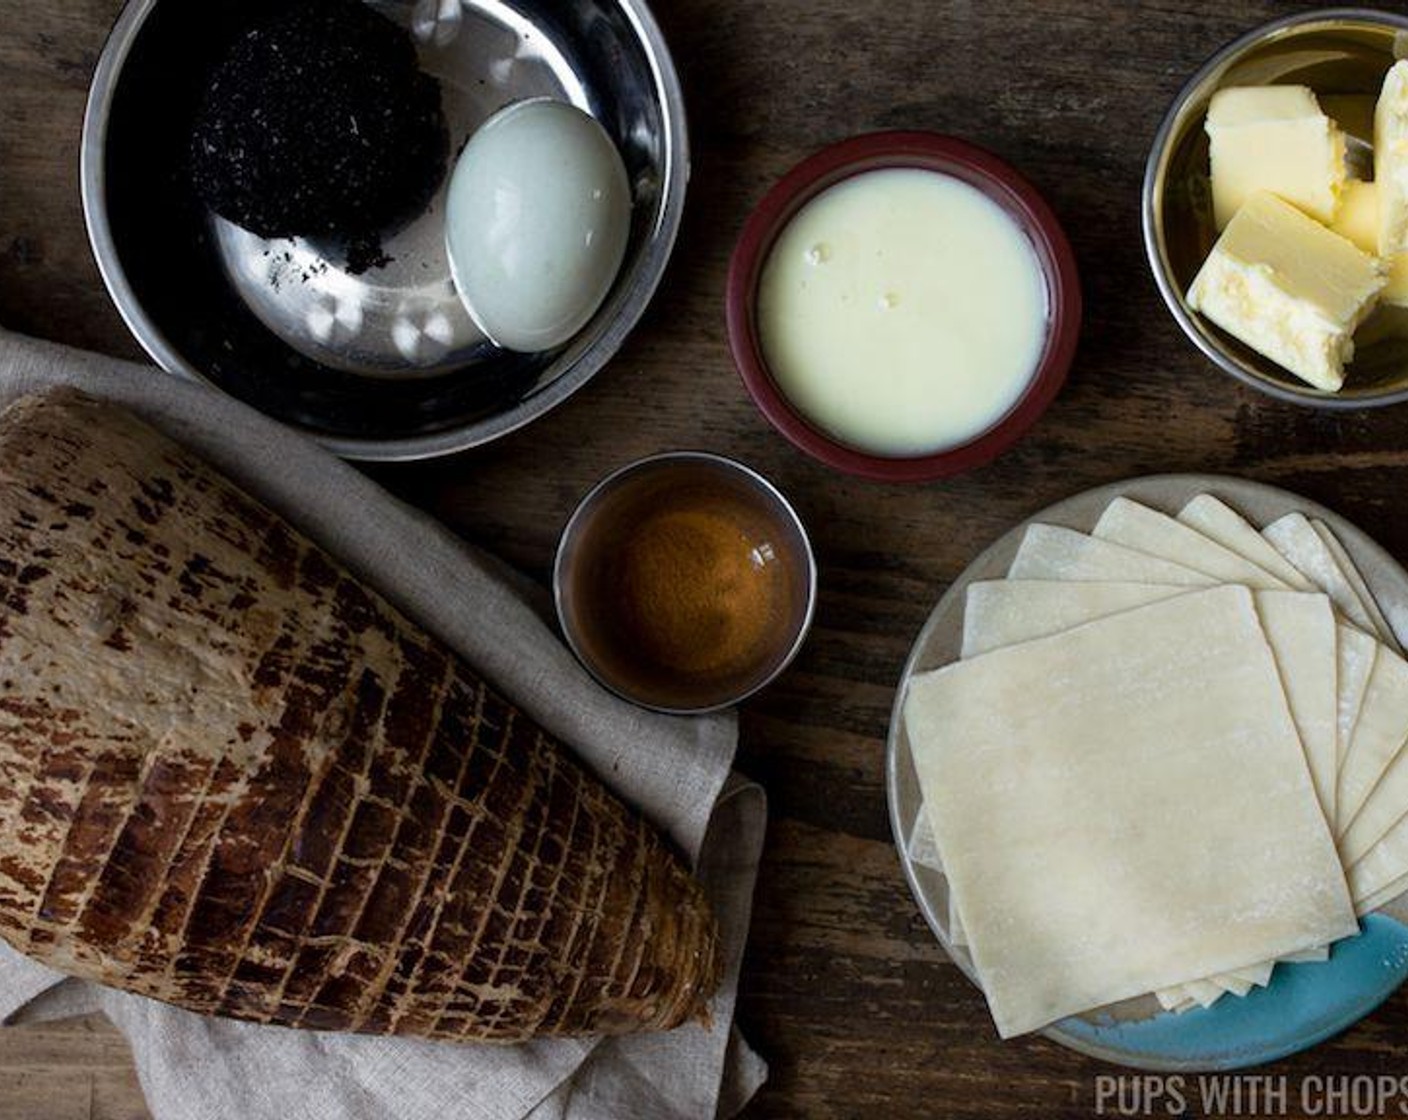
Use a dish cloth to hold the Taro (2 2/3 cups) so your skin is not directly touching the taro and peel it with a vegetable peeler.
step 2
Once the taro has been peeled, chop it up into 2-inch chunks.
step 3
Set the stove to medium low heat and fill a pot with water and boil the taro with a rolling boil for approximately 25 minutes – time will vary depending on how small or large you cut the taro. It is extremely important you fully cook taro before using it.
step 4
Check if the taro is done by sliding a knife through it. If there is any resistance, add 10-15 minutes to the cooking time. The knife should slide into the taro very easily like melted butter, if it doesn’t continue to cook it until it is soft.
step 5
When it is soft, drain the water and let it cool for 15 minutes.
step 6
Transfer the taro to a large mixing bowl and add Butter (3/4 cup), La Lechera® Sweetened Condensed Milk (1/2 cup) and Simply Organic Cinnamon, Ground (1 tsp) to it and mash it.
step 7
Add the Salted Duck Eggs (2), both whites and yolks and continue to mash it until it is very well incorporated and the duck yolks are evenly dispersed within the taro. You shouldn’t see big chunks of duck egg yolks.
step 8
The filling should have a thick mashed potato consistency, if it is too watery or thin you can cool it for 20 minutes in the fridge to solidify it a bit before folding the dumplings.
step 9
Use water to wet the edges of the Dumpling Wrappers (1 pckg) and fill the dumplings with the taro filling, about 1 1/2 teaspoon of filling. Do not over-stuff these little guys or they will be tough to fold together. Pressing the wet edges together will make it stick together.
step 10
Once you have a triangle formed, gently flatten it out the filling with your fingers. This will make it easier to twist the end together.
step 11
Hold the dumpling with folded seam facing you and the filling facing outwards and dab a bit of water onto one side of the dumpling.
step 12
While holding the ‘wings’ of the dumplings with your finger and thumb, press your fingers towards each other until the ‘wings’ overlap and then press down where you dabbed the water to hold it in place.
step 13
Set the stove to medium low heat and add a bit of oil to a non-stick frying pan.
step 14
Once the oil is hot, add the dumplings in. Do not overcrowd the pan – you may need to do this in a few batches.
step 15
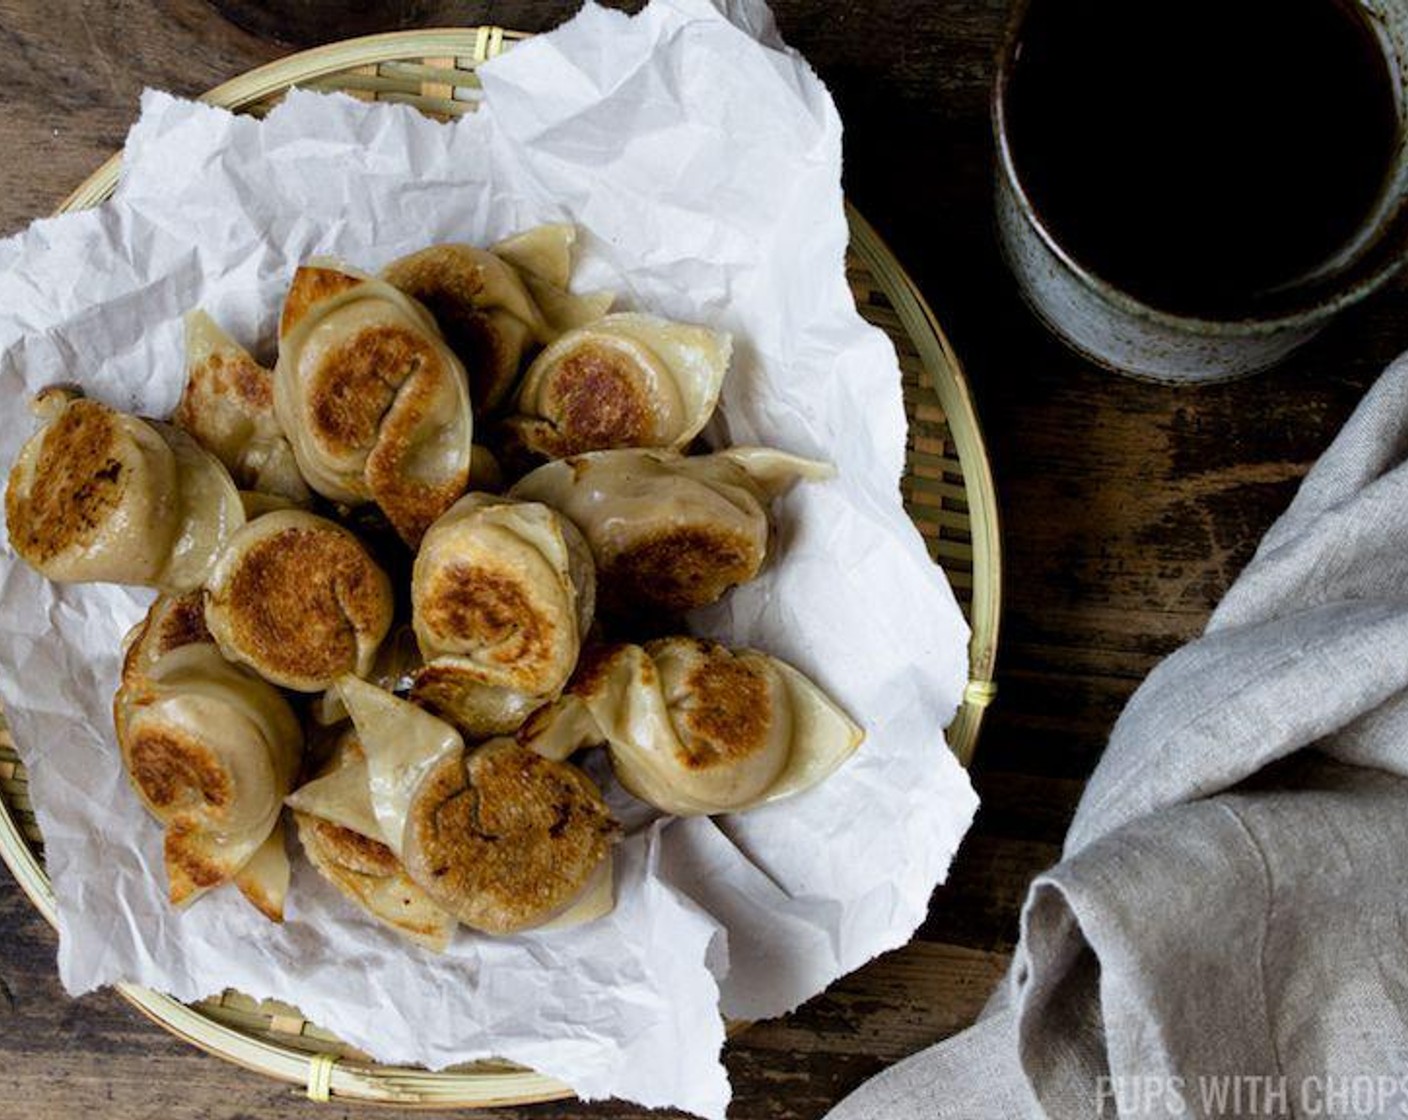
Brown both sides of the dumplings to a golden crispy brown.
step 16
Once both sides of the dumplings are crispy brown, add 1/4 cup of water into the pan and cover it with a lid and steam it for approximately 2 minutes or until the water has evaporated.
step 17
Once the water has almost evaporated, remove the lid to fully evaporate all the water. The dumplings will be super soft and can easily rip at this point, try to refrain from touching it until it has a a crispy brown bottom again. Flip the dumpling and cook the other side until it is crispy brown.
step 18
Remove from pan and enjoy as is or with a bit of dipping sauce!