step 1
Let's get started. Did you know that your oven does not need to preheat? A small thing that saves energy and over time helps to reduce your carbon footprint.
step 2
Using a spoon, peel the Fresh Ginger (1 Tbsp). Mince and set aside.
step 3
Mince Garlic (1 clove) and set aside.
step 4
Cut the Scallions (2 stalks) thinly at a diagonal angle and set aside for garnish.
step 5
Trim the ends off of the Green Beans (2 bunches) and slice in half at a diagonal; set aside.
step 6
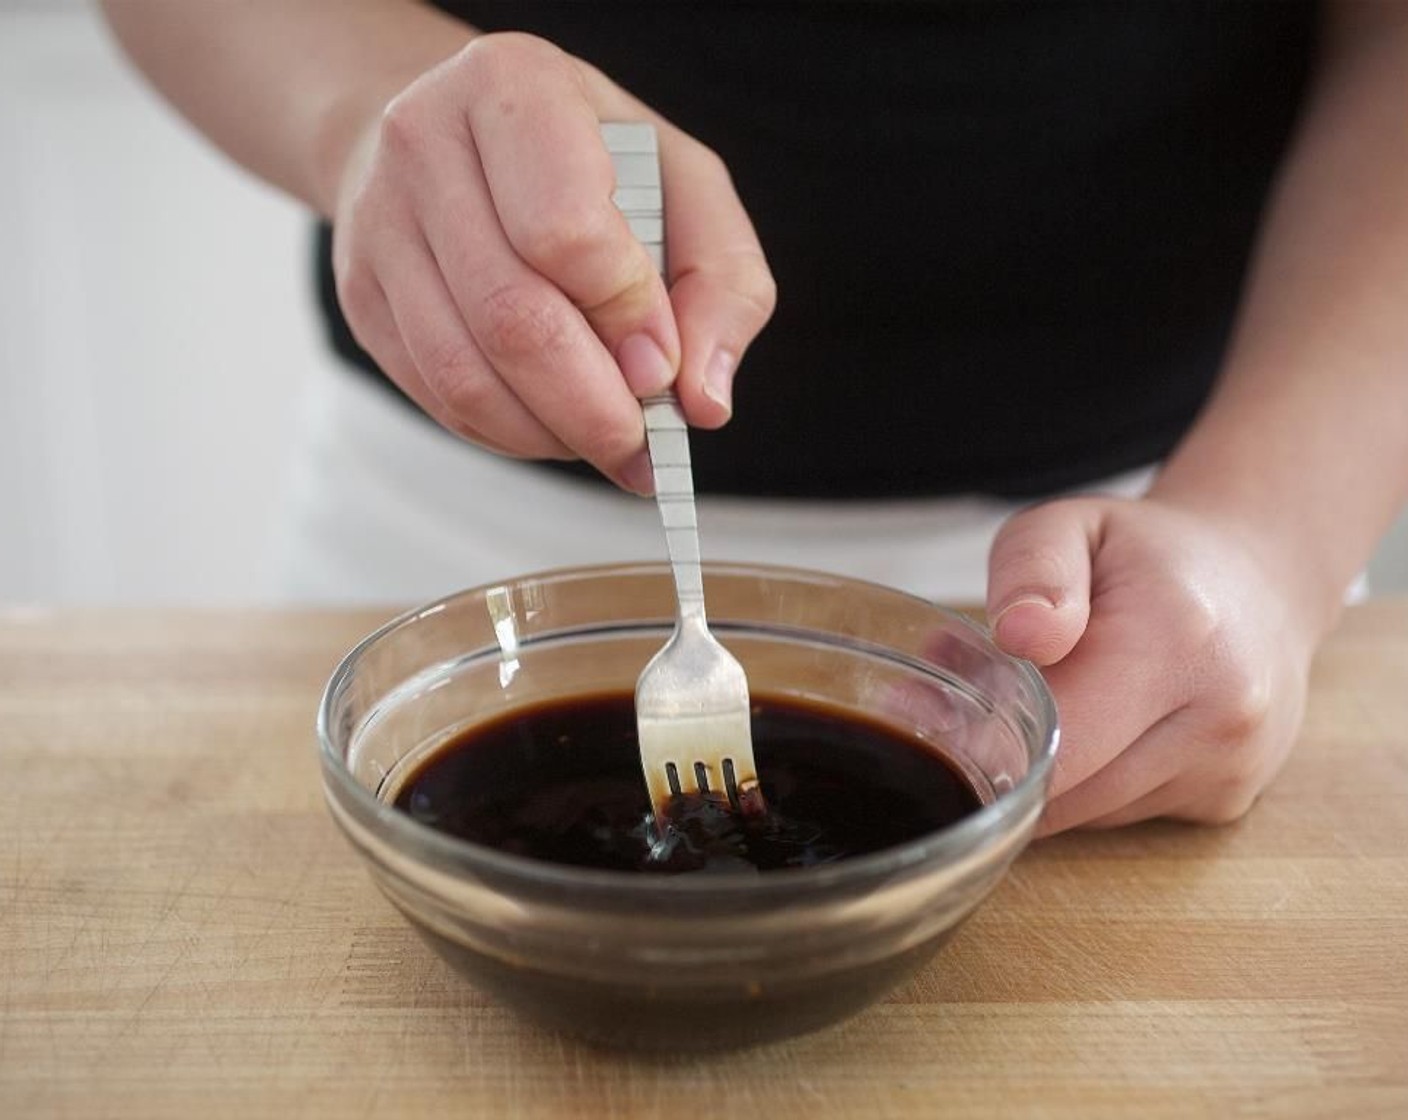
In a small bowl, combine the ginger, garlic, Sweet Soy Sauce (4 Tbsp), Sambal (2 tsp), Rice Vinegar (2 tsp), and Tamari Soy Sauce (4 Tbsp). Stir to combine; hold.
step 7
Pat the Beef Tenderloin (8 oz) dry with paper towels and season both sides with Salt (1/4 tsp) and Ground Black Pepper (1/4 tsp).
step 8
Heat olive the Olive Oil (2 tsp) in a medium sauté pan over medium-high heat. Sear the beef tenderloin for 3 minutes. Turn over and sear for 3 minutes more; remove from heat.
step 9
Place steaks on the foil-lined sheet pan and insert the meat probe. Thanks to the meat probe you can control the temperature, making sure the meat does not get too dry. Now just say 'Alexa, Start oven'. Just like magic, your oven automatically starts with the ideal setting for you. You will be notified once the temperature of your beef has been reached. Expect a cooking time of 6 to 7 minutes.
step 10
Once the steak is ready, let the it rest for 2 minutes. Meanwhile you can continue with the next step.
step 11
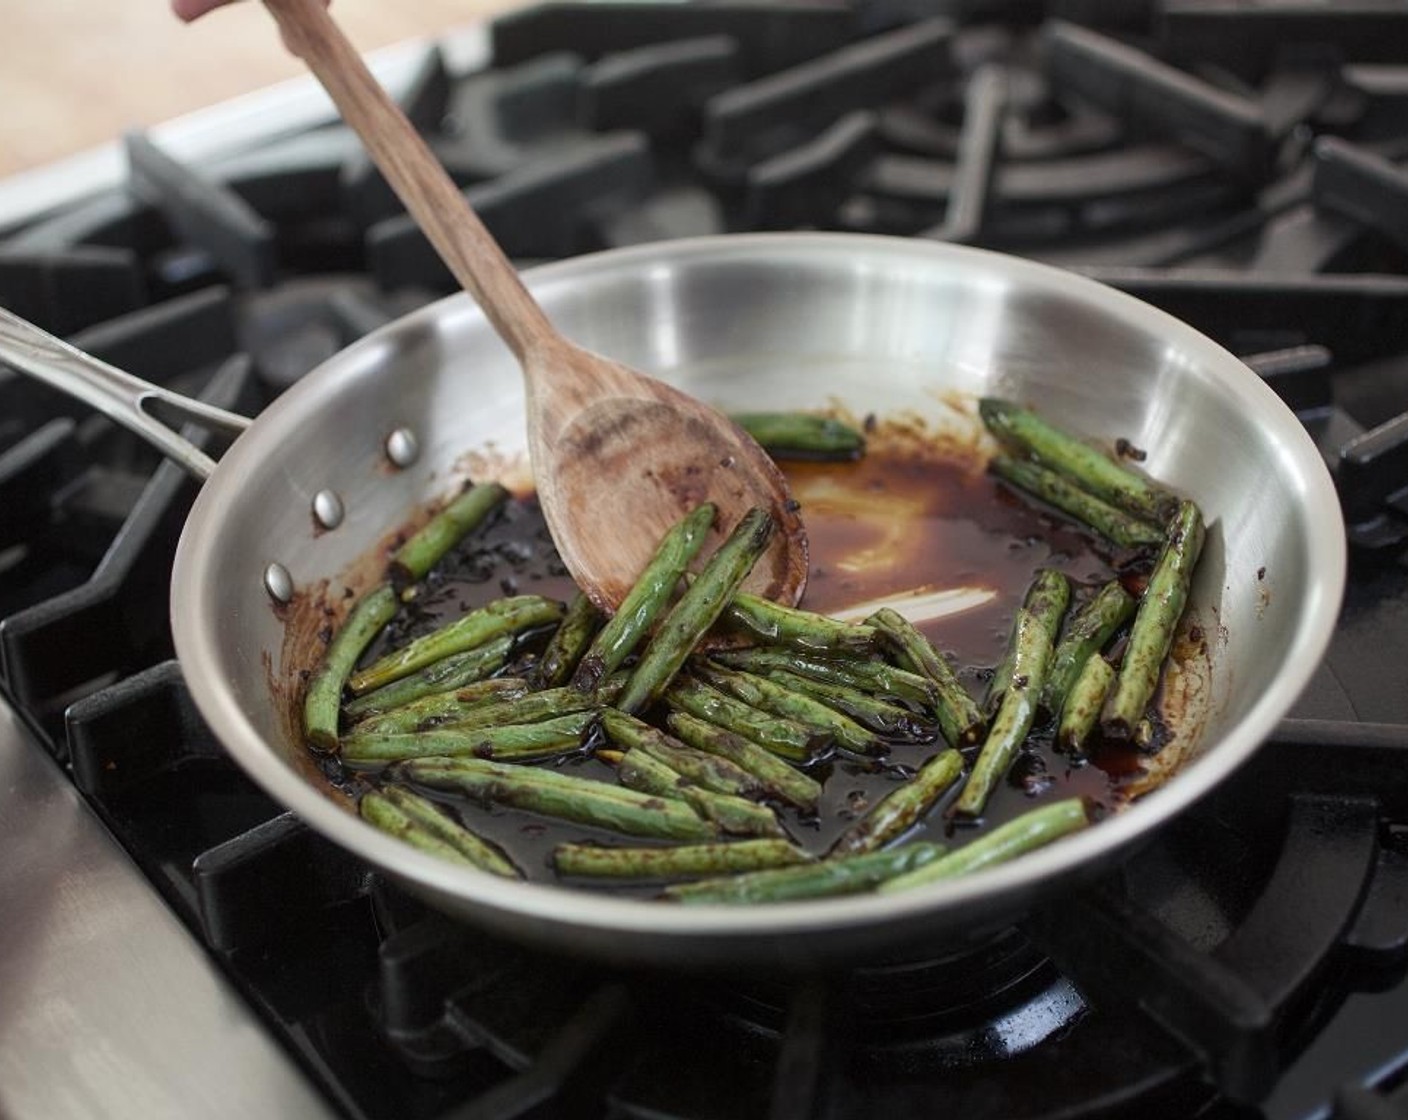
Meanwhile, heat a large sauté pan over high heat. Add Olive Oil (1 tsp) to the pan, and when hot, add the green beans and sauté for 2 minutes.
step 12
Add the sauce and cook for 3 minutes, until the sauce coats the green beans.
step 13
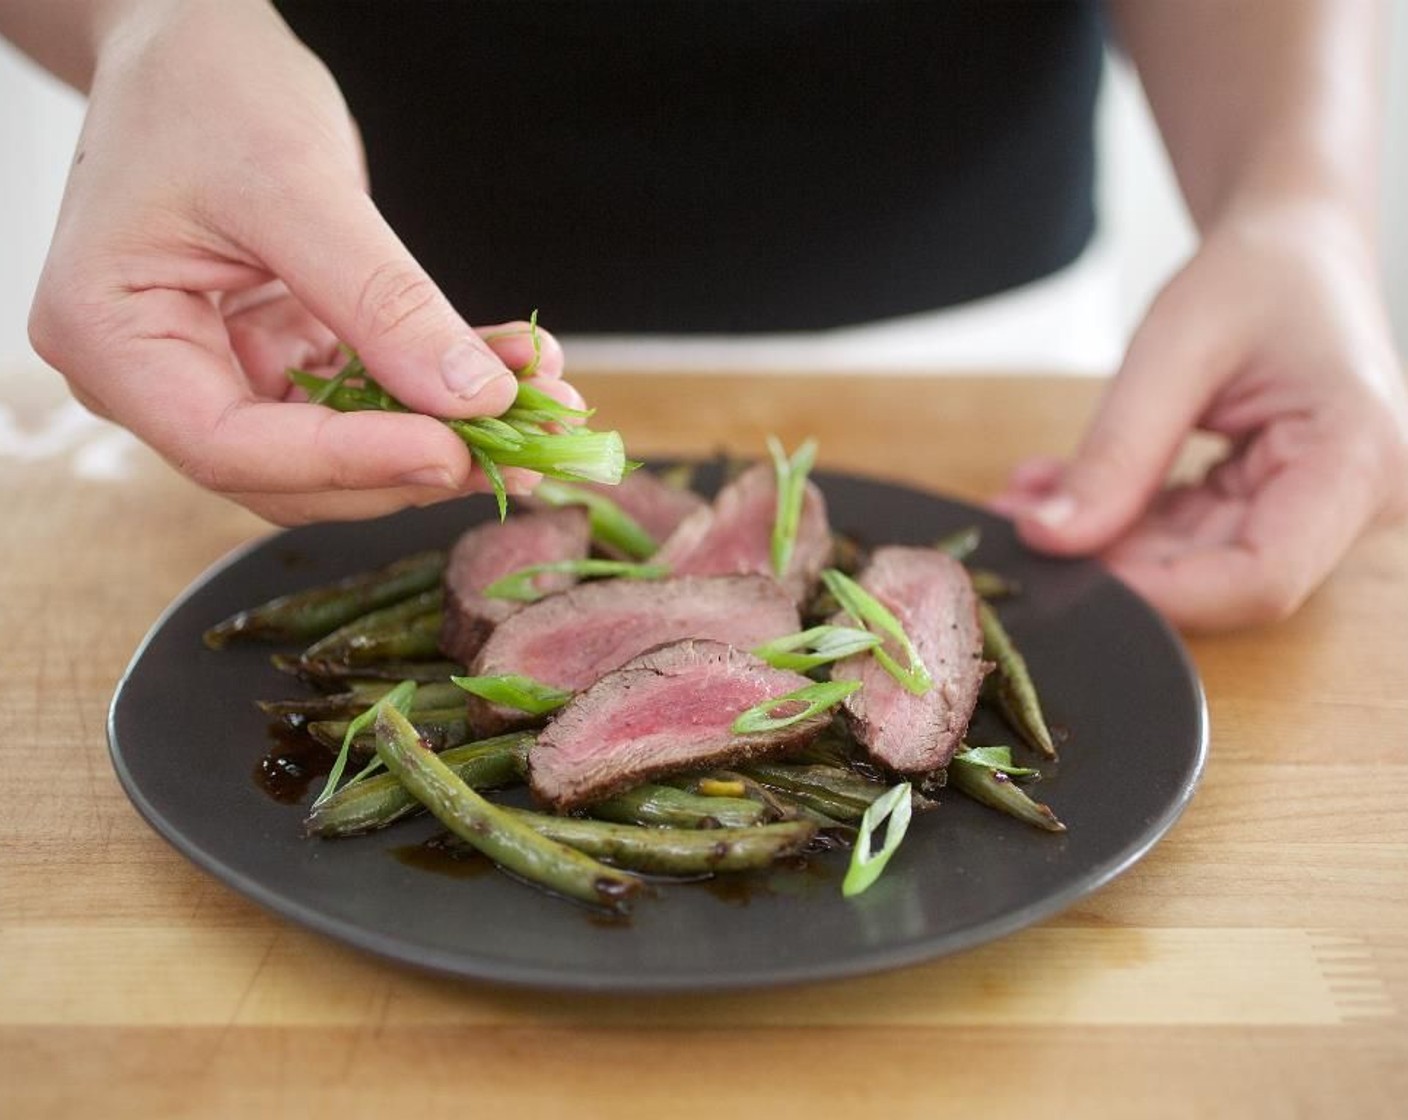
Slice the beef tenderloin into thin slices; set aside.
step 14
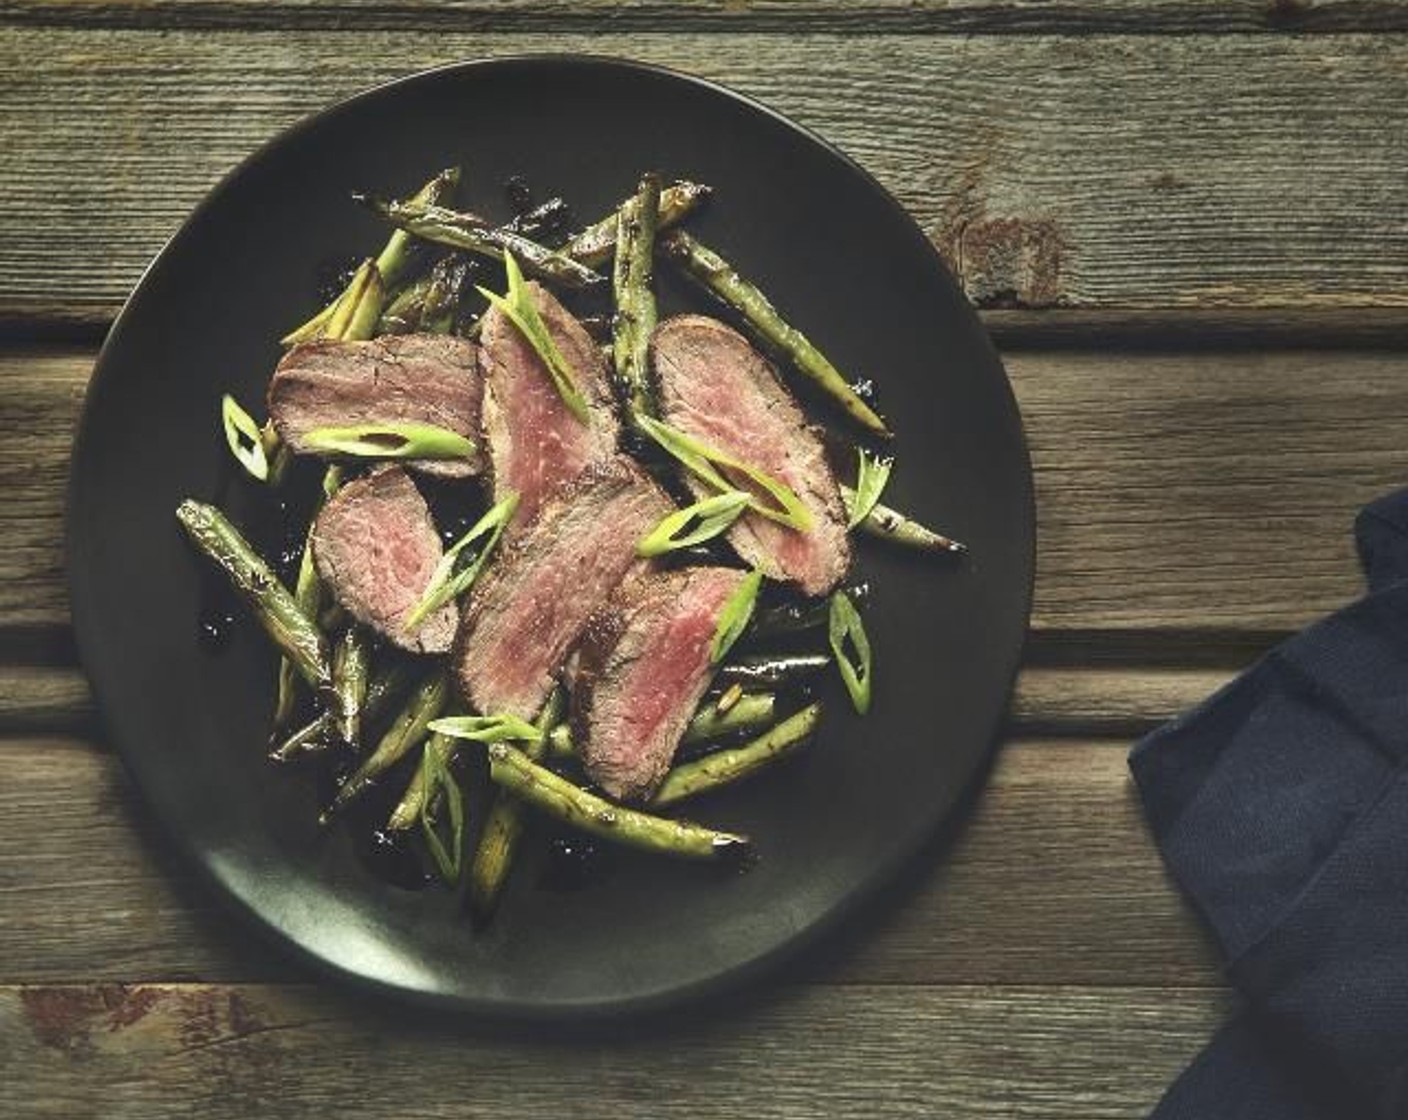
Divide the green beans evenly between two plates. Arrange the beef tenderloin slices on top of green beans. Garnish with scallions. Awesome, thanks to your fantastic cooking skills and with a little help from your oven, the meal is now ready to be served.